This post is about how I export/save my files for social media, blog and website (not for print).
At the time of writing, Instagram and Facebook still use this parameters, but being Instagram and Facebook, this can change at any time. It has been their standard for a while now though.
And remember: this is how I work, it does not mean it’s the golden standard or the only way to do it. I’m very into efficiency and this helps me keep my workflow to a minimum.

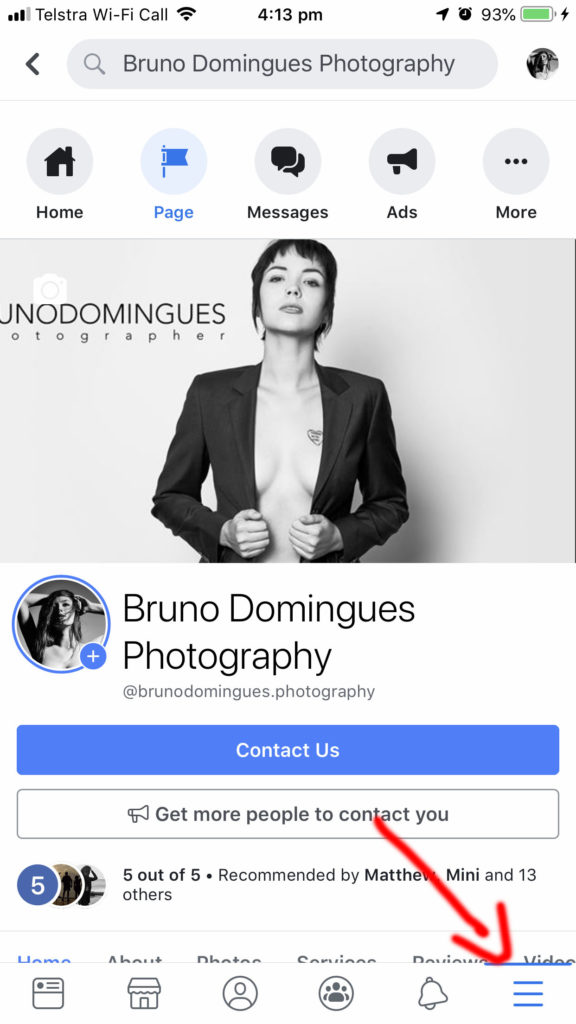
First of all, for this to work on Facebook you need to make sure you have the “Upload HD” setting on. If you are using a computer, you’ll need to create an album and tick the “High Quality” box. It’s easier to turn this setting on using a phone:
- Tap the … icon on bottom right;
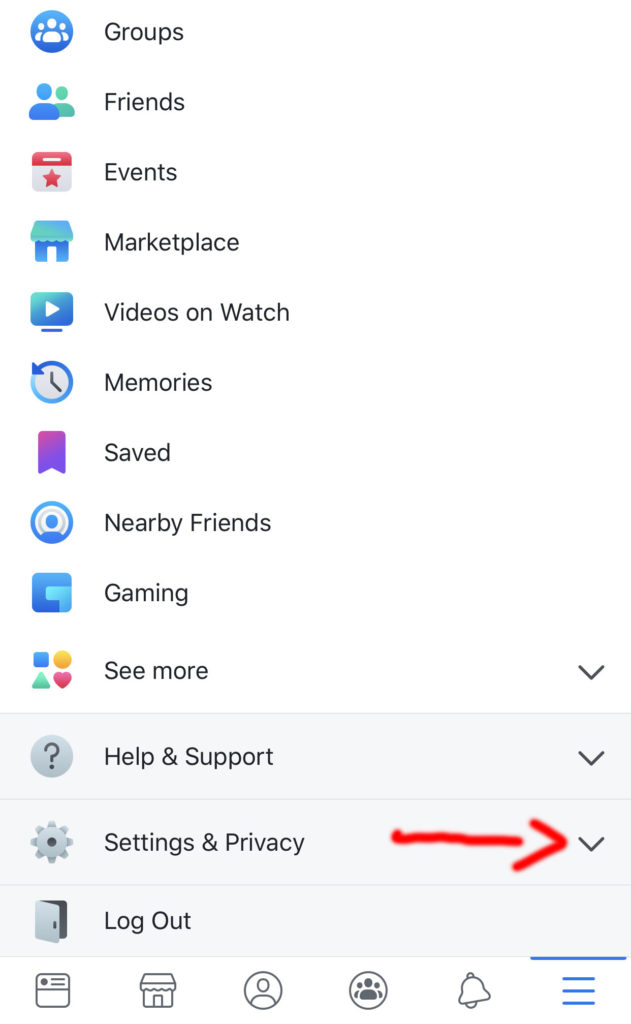
- Go to Settings & Privacy;
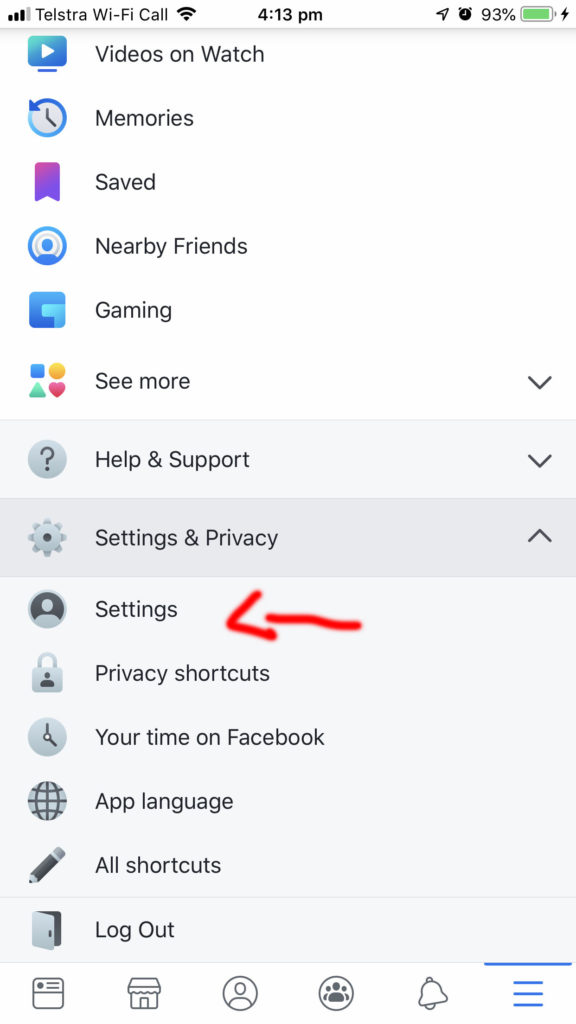
- Tap Settings;
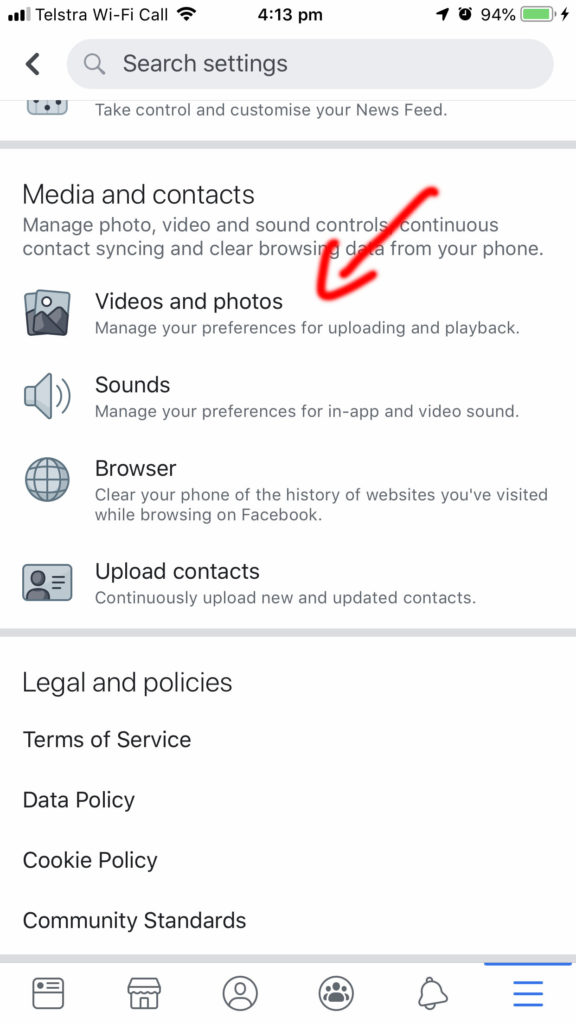
- Scroll down and tap Videos and Photos;
- Under PHOTO SETTINGS, turn Upload HD on.
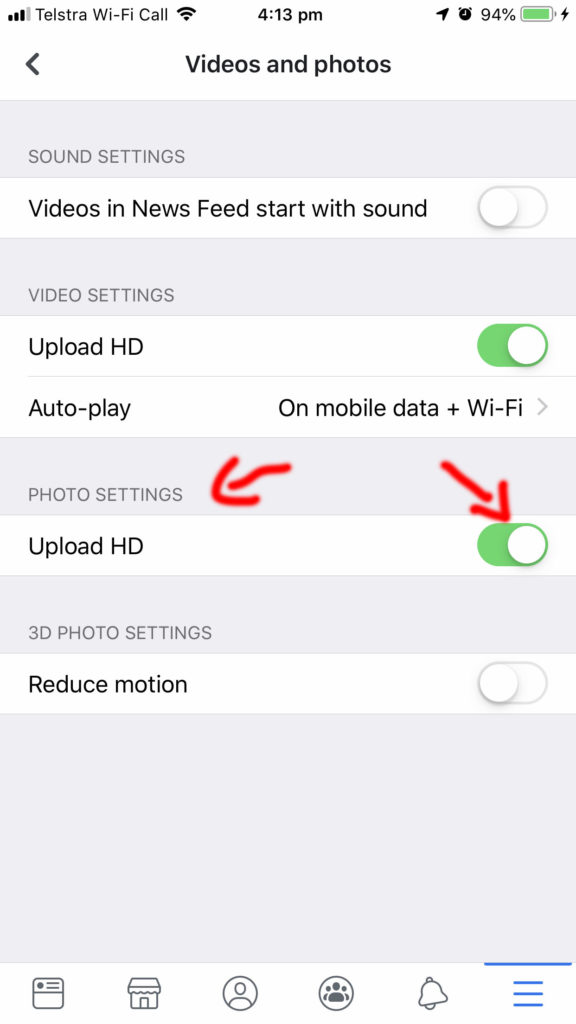
That’s how you setup your Facebook account to upload High Resolution images. Don’t worry about Instagram.
Exporting/Saving your files
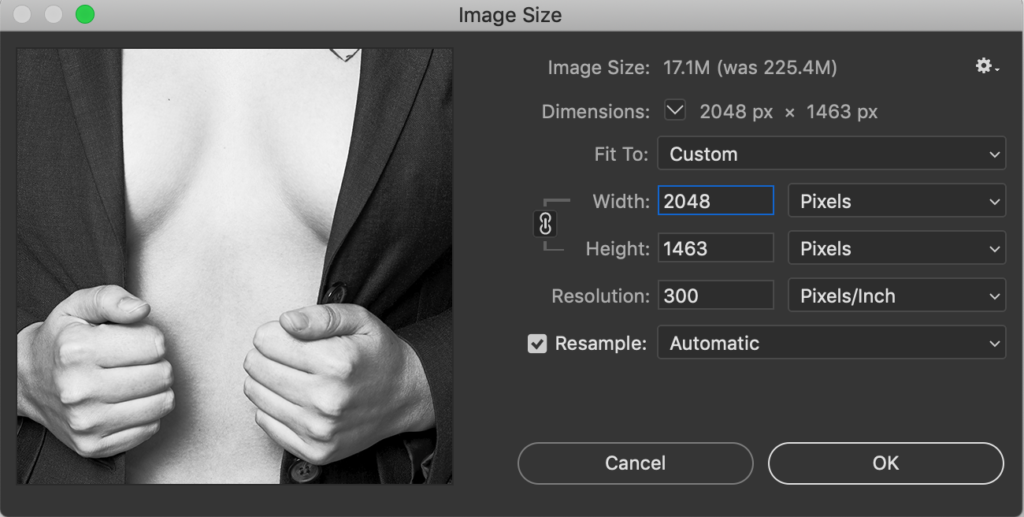
I have ONE size fits all for my files. Basically, all my files have 2048 pixels on the long edge and 72dpi. I deliver them to clients, upload them to my websites and blog, Facebook and Instagram. I know some people will have 1920 pixels (1080p) on the long edge for blogs and websites, but I rather have ONE single file.
I also NEVER export them with 100% JPEG quality (unless I’m exporting print files, of course).
Adobe Lightroom
I don’t use Adobe Lightroom anymore, but this is how I used to export them from LR when I used it: JPEG 70% Quality, sRGB Color Space, Resize to Fit Long Edge, Don’t Enlarge, 2048 pixels, Resolution 72 pixels per inch.

Keeping the metadata or doing any sharpening it’s up to you. Yes I know the web will reduce your sharpening so you can sharpen the image up a bit to compensate if you’d like.
Capture One Pro
Capture One Pro has been my weapon of choice for the past two years.
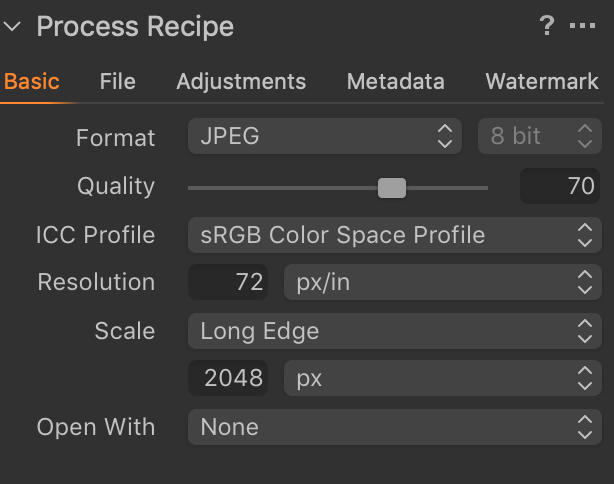
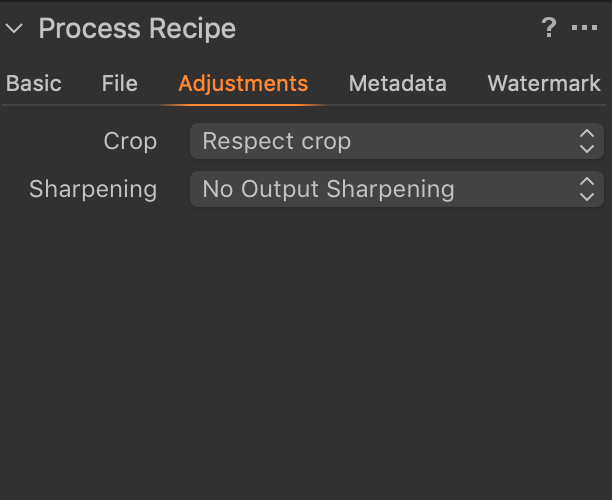
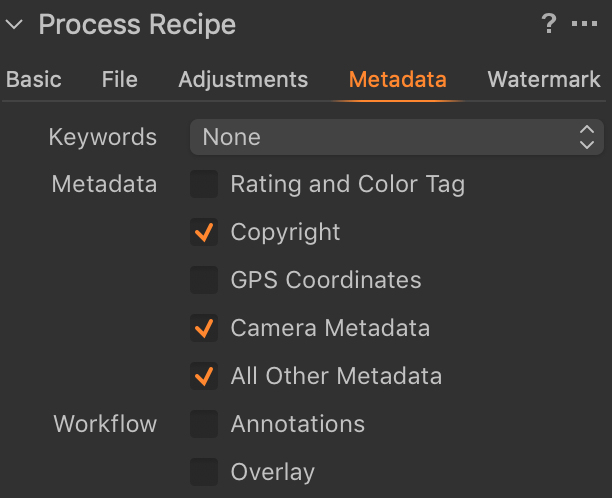
Same thing goes here: JPEG 70% Quality, sRGB Color Space, 72dpi Resolution, Scale Long Edge with 2048 pixels. Again, sharpening and metadata is up to you. You can change your DPI from 300 to 72 and then upscale your long edge to 2048 pixels (before hitting ok) or just leave your DPI as 300 and change the long edge size. DPI will not be that important anyway.
Adobe Photoshop
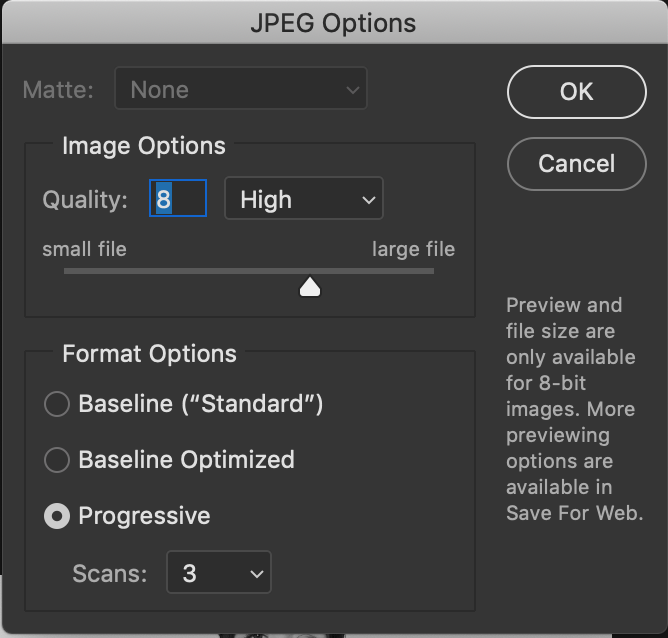
If you are saving your files directly from Adobe Photoshop, make sure you resize it first and then hit “save as”.
Save the file with Quality 8.
And that’s pretty much it! I hope this helps you keep your files small enough.

Bonus tip: compressing an image for WordPress
If you use WordPress for your website or blog, try a plugin called “EWWW Image Optimizer“. It will compress your images automatically when you upload them and I haven’t noticed any loss of quality!


